How to Use CrystalDiskMark
Quick start and main window, settings, and profiles.
How to Start a Benchmark
- Select Number of test runs (1–9, default 5).
- Select Test size: 16 MiB up to 64 GiB. Default 1 GiB; use smaller for USB/slow drives.
- Select Test drive (e.g. C:\, D:\). For network drives, run without Administrator rights.
- Click All (or a single test button) to start.
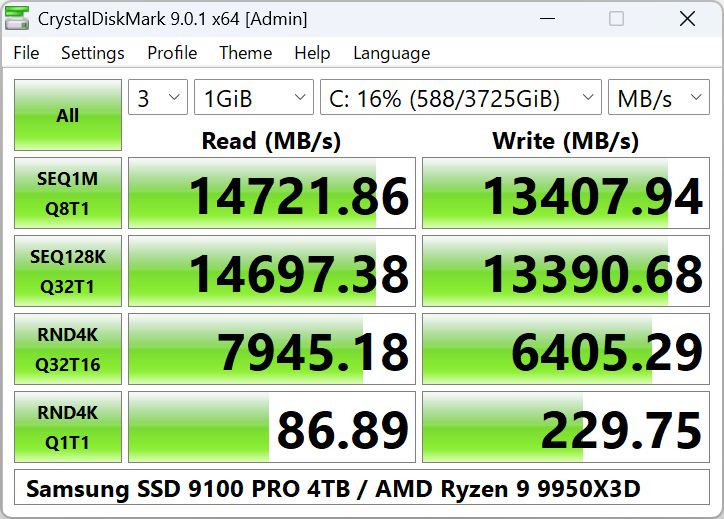
Main window: drive, test size, runs, and All / individual test buttons.
Test Settings
Configure block size, queue, and threads via Settings → Settings (or profile presets).
| Preset | Sequential | Random |
|---|---|---|
| Default | 1 MiB, Q1T1 / Q8T1 | 4 KiB Q1T1, 4 KiB Q32T1 |
| NVMe SSD | 1 MiB Q8T1, 128 KiB Q32T1 | 4 KiB Q1T1, 4 KiB Q32T16 |
Profiles
- Default – Standard test set.
- Peak Performance – Stresses maximum throughput.
- Real World Performance – More typical workload.
- Demo – Short demo run.
- Standard Edition also has +Mix variants (read/write mix).
Main Menu Overview
- File: Copy result to clipboard, Save as text (UTF-16LE), Save as image (PNG/JPEG/BMP), Exit.
- Settings: Test data (0 Fill / Random), Default/NVMe SSD presets, Settings dialog.
- Profile: Default, NVMe SSD, Peak, Real World, Demo, [+Mix] (Standard).
- Theme: Dark, Flower, DarkRed, Zoom, Font.
- Help: Manual, About, Crystal Dew World (web).
- Language: Switch UI language.
Units
Results can be shown as MB/s, GB/s, IOPS, or μs (average latency).
1 GB = 1000 MB = 1000×1000 KB. 1 GiB = 1024 MiB = 1024×1024 KiB. “MB/s” = 1,000,000 bytes/sec.
Understanding the Result Columns
After a run, the main window shows one row per test. Each row has a label (e.g. SEQ1M Q8T1, RND4K Q32T1) and four values: Read and Write. By default the values are in MB/s. You can switch to GB/s, IOPS, or latency (μs) from the interface. Higher numbers mean faster performance. When comparing two drives, run the same test (same size, same profile) on both. Sequential (SEQ) numbers are usually much higher than random (RND) on SSDs and NVMe.
Recommended Settings by Drive Type
- NVMe SSD: Profile → NVMe SSD. Test size 1–2 GiB. Runs 3–5.
- SATA SSD: Default profile, 1 GiB, 3–5 runs. Sequential typically 500–560 MB/s.
- HDD: Default, 1 GiB or 512 MiB. Fewer runs (1–3) to save time.
- USB flash / external HDD: Small test size (64–128 MiB). Default profile.
- Network drive: Run without Administrator. Moderate size (256 MiB–1 GiB).
Tips for Accurate Results
- Close other heavy applications and file transfers.
- Use the same test size and profile when comparing drives.
- Do not compare results between different major versions of CrystalDiskMark.
- For SSDs, results can be higher when the drive is empty.
- Run as Administrator for local drives if benchmark fails; run as normal user for network drives.
Video Tutorial
Add a tutorial as vd/crystaldiskmark-quick-start.mp4 or vd/crystaldiskmark-quick-start.webm to show it here.